Shielding Your Space: A Comprehensive Guide to Garage Door Insulation and Weatherproofing
Are you tired of your garage feeling like an icebox in the winter and a sauna in the summer? Do you wish there was a way to make it more comfortable while also saving energy and money on your utility bills? Look no further than garage door insulation.
By adding insulation to your garage door, you can battle the elements and create a more comfortable space for yourself and your belongings. Not only does garage door insulation provide temperature control, but it also offers noise reduction and increased durability.
Plus, with so many different insulation materials available on the market, it’s easy to find one that fits both your budget and personal preferences. In this practical guide to garage door insulation, we’ll walk you through everything you need to know about choosing the right material, measuring for installation, preparing your door for insulating, and maintaining it for maximum efficiency.
Say goodbye to uncomfortable garages forever!
The Benefits of Garage Door Insulation
You’ll feel the difference in temperature and noise levels inside your garage once you have insulation installed. Not only does it make your garage more comfortable, but it also offers numerous benefits such as improved energy efficiency.
Insulation acts as a barrier to prevent heat from escaping during colder months, keeping your garage warmer for longer periods of time. This results in lower heating costs and less strain on your HVAC system.
Insulation also helps regulate the temperature inside your garage during hot summer months. It prevents heat from penetrating through the door and into the space, which means that you won’t have to rely on air conditioning units as much.
Additionally, insulation reduces outside noise that enters your garage, making it a quieter space for any activities or projects you may have going on inside. With all these benefits in mind, choosing the right insulation material is key to maximizing its effectiveness and ensuring long-lasting results.

Choosing the Right Insulation Material
When it comes to picking out the best insulation material for your garage door, you want to make sure it’ll keep your space cozy and warm during chilly weather.
There are several types of insulation available in the market, including fiberglass, foam board, reflective foil, and cellulose. Each type has its own advantages and disadvantages.
Fiberglass is a popular choice because it’s affordable and easy to install. Foam board is another option that provides excellent insulation but can be more expensive than fiberglass. Reflective foil is ideal for hot climates as it reflects heat away from the garage. Lastly, cellulose is an eco-friendly option made from recycled materials but can be messy to install.
Consider the cost comparison between these options before making a decision on which one to use for your garage door insulation project.
With this in mind, let’s move on to measuring your garage door to ensure proper installation of the chosen material.
Measuring Your Garage Door
To measure your garage door for insulation, you’ll need a measuring tape, a pen and paper, and possibly a ladder to reach the top of the door.
Start by measuring the width and height of each panel on your garage door to determine how much insulation material you’ll need.
Calculate the total square footage of your garage door and consult with insulation manufacturers or professionals to determine the amount of insulation needed for optimal energy efficiency.
Tools Needed
One essential aspect of this project involves gathering the necessary tools for successfully completing the job. Tool organization is key to ensuring that you have everything you need before starting the insulation process.
Some of the tools required include a tape measure, utility knife, straight edge, gloves, safety glasses, and a caulking gun. Before using any of these tools or beginning your insulation project, it’s important to take proper safety precautions.
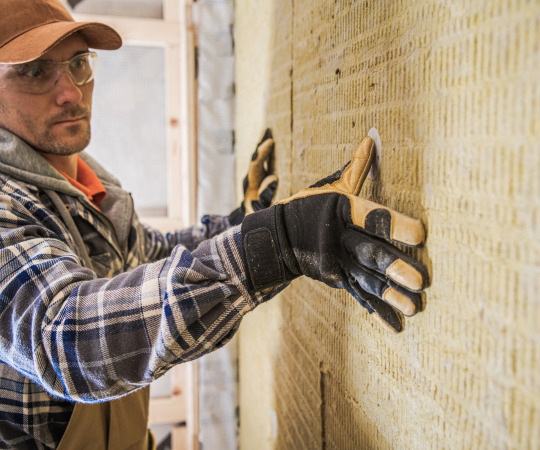
Wear gloves and safety glasses to protect yourself from sharp edges while handling insulation materials. Additionally, make sure to follow manufacturer instructions when using any power tools or equipment involved in the process.
With all necessary tools gathered and safety measures taken into consideration, you can now proceed with measuring your garage door for insulation installation.
Measuring Techniques
You’re about to embark on a journey of discovery, like a treasure hunter searching for hidden gems, as you learn the proper techniques for measuring your garage door for optimal energy efficiency. Measuring accuracy is key when it comes to insulating your garage door.
One common mistake is assuming that all doors are uniform in size, which can lead to purchasing too much or too little insulation. To avoid this error, measure each panel individually and take note of any variations in size.
Measuring irregularly shaped doors can be tricky but there are custom insulation options available. If your garage door has windows or unique shapes, consider ordering insulation panels that are cut to fit those specific areas. This will ensure maximum coverage and energy savings.
Once you’ve measured accurately and identified any irregularities in shape, you’ll be ready to move on to calculating your insulation needs without missing a beat.
Calculating Insulation Needs
Now it’s time to figure out exactly how much insulation you’ll need to keep your energy bills low and maintain a comfortable temperature in your garage.
The first step is to determine the insulation thickness required for your garage door. This will depend on the R-value calculation, which measures the resistance of heat flow through a material. The higher the R-value, the better the insulation.
To calculate the R-value needed for your garage door, consider factors such as climate, desired temperature, and frequency of use. For example, if you live in a colder climate and want to maintain a consistent temperature in your garage year-round, you may need a higher R-value than someone who only uses their garage occasionally.
Once you have determined the necessary R-value, consult with an expert or refer to manufacturer guidelines to determine the appropriate insulation thickness.
With your insulation needs calculated, it’s time to prepare your garage door for installation.
Preparing Your Garage Door
Before you start adding insulation to your garage door, there are a few key steps you need to take to prepare.
First, clean and sand the surface of your garage door to ensure that the adhesive will properly adhere.
Next, apply the adhesive according to manufacturer instructions, taking care not to use too much or too little.
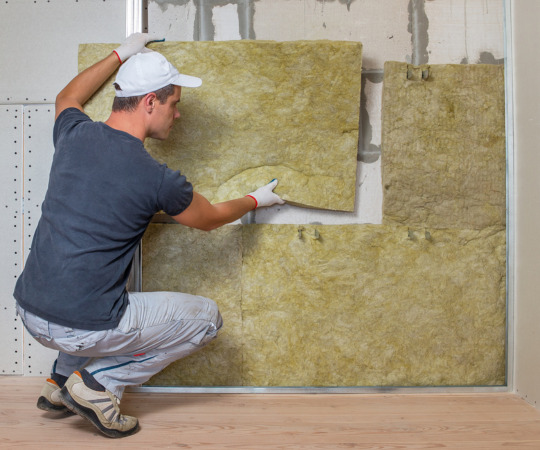
Finally, cut and fit the insulation into place, making sure that it’s snug against the garage door panels for maximum effectiveness.
By following these steps, you’ll be well on your way to a more energy-efficient garage.
Cleaning and Sanding
As you scrub away the grime and sand down any rough spots, it’s like giving your trusty shield a fresh coat of paint before heading into battle. Cleaning and sanding are crucial steps in preparing your garage door for insulation. Here are some cleaning techniques and sanding tips to help you get started:
- Use a mild detergent mixed with warm water to clean the surface of your garage door.
- For tough stains or grease, use a degreaser or vinegar solution.
Be sure to rinse thoroughly with water and let dry completely before moving on to sanding.
- Use a fine-grit sandpaper to smooth out any rough spots or peeling paint.
- Avoid over-sanding as it can damage the surface of your garage door.
Once you have cleaned and sanded your garage door, it’s time to move onto applying adhesive. This step is essential in ensuring that the insulation remains securely attached to your garage door.
Applying Adhesive
After cleaning and sanding, it’s time to stick the insulation on your shield-like surface with adhesive to ensure a secure hold against the cold. Before applying the adhesive, make sure you’re using an appropriate type for your garage door material, as some adhesives may not work well with certain surfaces. It’s also important to read and follow all safety precautions listed on the adhesive label.
To start applying the adhesive, first measure and cut your insulation pieces to fit snugly onto each panel of your garage door. Then, apply a generous amount of adhesive onto each panel, making sure to spread it evenly with a brush or roller.
Once applied, quickly but carefully press the insulation piece onto the panel and smooth out any air bubbles or wrinkles. Repeat this process for each panel until all are covered in insulation.
With the insulation securely attached to your garage door panels, you can move on to cutting and fitting them into place for maximum effectiveness.

Cutting and Fitting Insulation
Now it’s time for you to take control and make sure your newly insulating material fits snugly into each panel of your shield, so that you can win the war against cold weather.
First, consider the thickness of your insulation. Thicker insulation may provide better temperature regulation, but it can also be harder to cut and fit properly. If you choose a thicker material, make sure you have adequate cutting tools such as a utility knife or saw.
Next, measure each panel of your garage door carefully and mark the insulation accordingly. Use your cutting tools to trim the insulation precisely along these marks.
As you fit each piece of insulation into its corresponding panel, ensure there are no gaps or spaces where air could escape or enter. Take note that some panels may require additional adjustments due to their unique shape or size.
With your insulation fully cut and fitted, now it’s time for installation without any delay!
Installing the Insulation
Now that you’ve prepared your garage door for insulation, it’s time to start the installation process.
The first step is securing the insulation panels in place. You’ll also need to seal any edges and joints to ensure maximum efficiency.
Finally, adding a reflective barrier can further enhance the insulation’s effectiveness against extreme temperatures.
Securing Insulation Panels
Well, ain’t this just the bee’s knees – we’ve reached the section on locking down those fancy schmancy panels.
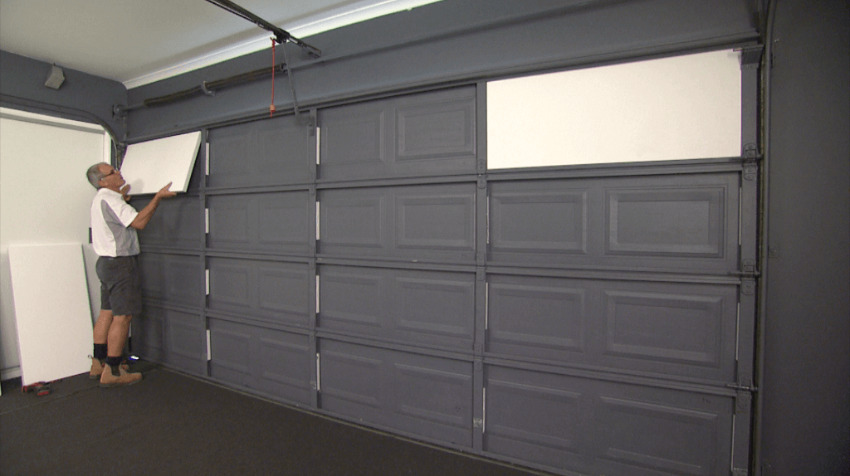
Now that you’ve got your insulation panels cut and fitted to your garage door, it’s time to secure them in place. The easiest way to do this is by using brackets and fasteners to secure the panels onto each section of the door.
Start by attaching brackets onto each panel, making sure they are evenly spaced apart. Use a drill or screwdriver to insert securing fasteners through both the bracket and panel into the garage door. Make sure that each panel is securely fastened before moving on to the next one.
Once all panels are in place, give them a gentle tug to ensure they’re snugly fitted against the door.
With that done, let’s move on to sealing edges and joints for maximum insulation effectiveness!
Sealing Edges and Joints
To ensure maximum insulation effectiveness, you’ll want to seal up those edges and joints tight as a drum!
Sealing techniques can involve using weather stripping or caulking. Weather stripping is an effective option for sealing gaps between the garage door and its frame. It comes in various materials such as foam, rubber, or vinyl and can be easily cut to fit any size of gap. Simply apply the weather stripping along the edges of your garage door panels, making sure it’s snugly fitted against the surface.
Caulking is another great option that works well on joints where two surfaces meet. Apply a bead of caulk along the joint between the garage door panels and frame to fill any gaps or cracks. Make sure you smooth out any excess caulk with a putty knife or your finger for a clean finish.
Once you’ve sealed all those pesky gaps and cracks with either method, it’s time to move on to adding a reflective barrier to your garage door for even more insulation power!
Adding a Reflective Barrier
Boost the effectiveness of your insulation by adding a reflective barrier. Reflective foil works wonders when it comes to insulating your garage door. Its shiny surface reflects heat back into your garage during winter and bounces sunlight away during summer, keeping your garage cooler. This is a smart way to keep the heat in and the cold out, maximizing your energy savings all year long.
When installing reflective foil, make sure it’s placed between the door panels and insulation material. Use adhesive spray or tape to secure its edges. Ensure that there aren’t any wrinkles or gaps in the foil because this will reduce its effectiveness in reflecting radiant heat.
Additionally, you can use double-sided tape to attach a layer of foam board insulation on top of the foil for added protection against external elements. Now that you’ve added a reflective barrier, maintaining your insulated garage door should be next on your list.
Regularly inspecting for any signs of wear and tear and fixing them promptly will ensure that your investment lasts longer and continues to provide excellent thermal protection.
Maintaining Your Insulated Garage Door
If you don’t keep up with regular maintenance, your insulated garage door may not function as well as it should. Maintaining insulation is key to keeping your garage warm in colder months and cool in warmer months. Insulation can become damaged over time, especially if it’s not properly maintained.
Check for any cracks or gaps and fill them in with foam insulation or weather stripping. Regularly clean the door to prevent dirt and debris from accumulating on the surface, which can cause damage to the insulation.
Preventing damage is also important when maintaining your insulated garage door. Avoid hitting the door with heavy objects or vehicles, which can cause dents or scratches that could eventually compromise the insulation. Lubricate all moving parts of the door regularly to ensure smooth operation and reduce wear and tear on the system.
By taking these simple steps, you can ensure that your insulated garage door functions efficiently year-round, providing a comfortable space for all of your needs.
Frequently Asked Questions
How much does garage door insulation typically cost?
Looking to insulate your garage door? The cost of garage door insulation can vary depending on whether you choose to go the DIY route or hire a professional. DIY insulation kits are typically less expensive, ranging from $50-$150 for materials. However, if you opt for professional installation, expect to pay around $500-$800.
While the initial cost may seem steep, properly insulated garage doors can save you money in the long run by reducing energy bills and increasing the longevity of your garage door. Ultimately, the decision between DIY and professional installation comes down to your skill level and budget.
Can I insulate a garage door myself or should I hire a professional?
If you’re considering insulating your garage door, you may be wondering whether to tackle the project yourself or hire a professional. While DIY insulation can save money, it’s important to consider whether you have the skills and tools necessary for the job.
If you’re comfortable with measuring and cutting materials, have experience working with insulation and a variety of tools, and are willing to invest time in the project, then DIY insulation may be a feasible option for you. However, if you’re unsure about any of these factors or prefer to leave the job to someone else, hiring a professional installer may be a better choice.
A professional will have the expertise and equipment needed to ensure that your garage door is properly insulated, providing optimal energy efficiency and protection from the elements. Ultimately, it’s up to you to decide which route is best for your specific situation.
Will insulating my garage door affect its operation or lifespan?
Insulating your garage door is a smart move that can help you save money on energy bills and enhance the comfort of your home. However, you may be wondering whether this process will affect the operation or lifespan of your garage door.
The truth is that proper garage door insulation maintenance won’t cause any harm to your door as long as it’s done correctly. You need to choose the right insulation material types for garage doors, such as foam board or reflective foil, and make sure they’re installed properly.
Regular inspections and cleaning can also extend the life of your garage door and keep it functioning smoothly for years to come. So go ahead and insulate your garage door with confidence, knowing that you’re making a wise investment in your home’s energy efficiency and comfort while also protecting its longevity.
How much energy savings can I expect from insulating my garage door?
If you’re looking to save on your energy bills, insulating your garage door is a great place to start. The insulation materials used in garage doors can greatly improve the energy efficiency of your home by reducing drafts and keeping heat inside.
By adding insulation to your garage door, you can expect to see significant savings on your heating and cooling costs throughout the year. Not only will it keep your home comfortable, but it’s also an eco-friendly option that reduces your carbon footprint.
With a variety of insulation materials available, including foam board and reflective foil, there are options for every budget and preference. Investing in garage door insulation is a smart decision for any homeowner looking to increase their energy efficiency while saving money in the long run.
Can I insulate my garage door if it has windows or other decorative features?
You’ve likely wondered if it’s possible to insulate your garage door even if you have decorative options such as windows or other features. The good news is that there are alternative solutions available that can help you achieve the same level of insulation without sacrificing style.
You can opt for insulated panels with window cutouts, which provide a sleek and modern look while still offering excellent thermal protection. Alternatively, you can install a secondary layer of insulation directly over your existing garage door, effectively sealing off any gaps and boosting energy efficiency.
With these decorative options in mind, you don’t have to compromise on aesthetics when it comes to insulating your garage door against the elements.
Conclusion
Congratulations! You’ve successfully insulated your garage door and now enjoy the benefits of a more comfortable and energy-efficient space.
But before you pat yourself on the back, let me share with you an interesting statistic that may evoke some emotions.
Did you know that, according to the U.S. Department of Energy, uninsulated or poorly insulated garages can account for up to 30% of heat loss in a home? That’s right – almost one-third of your heating bill may be wasted due to a lack of proper insulation in your garage door.
By insulating your garage door, not only will you save money on energy bills but also reduce your carbon footprint by consuming less energy overall.
So next time you step into your cozy and warm garage, remember that by taking this small yet impactful action, you’re contributing to a more sustainable future for our planet.
Keep up the good work!
Related Source


